Showing posts with label DIY. Show all posts

Thursday, June 6, 2013

Stripes, Sliced Cucumber & Elephant Skin, Oh My!

Hi loves! It's been a while since I've posted a little DIY action, but that changes today! The majority of our house {with the exception of the guest bedrooms} is extremely boring with the beige.. it almost makes everything have a yellow tint - YUCK! We decided to spruce up our laundry room with stripes and I'm so glad that we did! It almost makes me want to do laundry.. almost. I wanted something refreshing, but contrasting and gray was a must for one of the colors. We decided on Elephant Skin for the gray and Sliced Cucumber for the pale, and refreshing, green. We are happy, happy, happy with the results! Now Tyler wants to do stripes in another room... so we'll see!

My Inspiration:
Via

 Here's the boring beige.. so blah!

Step 1:
Using the lightest color, paint the entire wall(s). For us, we painted the walls Sliced Cucumber and we painted the ceiling Elephant Skin.. we wanted absolutely no beige left!

Step 2:
Measure the wall, divide the wall horizontally with painters tape (we used frog tape), then lightly paint against the tape to seal it from leaking. Ours wall is 116" tall, so we divided the wall into 8 stripes (the bottom two stripes were 16" and the top six stripes were 14"). You can't even tell that they are different dimensions!
Helpful hint: seal the tape with the base color, not the second color, that way what leaks through won't matter. Let that dry then paint your second color and it won't leak because the base color already sealed it.

 Step 3:
Using the contrasting color, paint every other stripe. Since we painted our ceiling gray, we started from the top using green, so there would be a contrast.

 Step 4:
Even though we "sealed" the tape, there were still mess ups. Once the paint has dried completely (and you've removed the previous tape) re-tape on top of the color that leaked. Then lightly cover with the other color and remove the tape immediately. It's a tedious process, but the results are SO worth it!

 Here's the finished product! We are in love.. makes such a difference!

Now that the painting's done, we have a few more to-dos left in the Laundry Room! Here's the rundown:

- Add some sort of window treatments
- Add a runner/rug
- Framed wall art & accessories
- New light fixture (something like this)
- Paint cabinets/base boards/door (they're all off-white)
- New washer/dryer (Would these old things die already!)


Linking up with Steph and Katie!
 
Happy Thursday, y'all!

Photobucket

Thursday, April 4, 2013

DIY Spring Wreath: Saw It, Pinned It, Did It!

Spring is in the air, at least in Dallas! I've been wanting to make this wreath ever since I saw this version on Pinterest! This project took an entire morning, but was SO fun for Tyler and I to work on together. We just had golf on in the background and I would randomly bust out some Lady A - Downtown - since it's been stuck in my head for days!

Supplies Needed:
- Styrofoam Wreath
- Natural Jute or Colorful Twine
- Fabric (at least 4 options) of your choice
- Scissors
- Cotton Balls
- Hot Glue Gun and Sticks
- Thread and sewing needle
- Tacks or Straight Pins
- Bird and Flower templates

Step 1: Gather all  materials.
Step 2: With your hot glue gun, adhere the jute at a starting point on the wreath. Keep going around the wreath placing a dot of glue sporadically throughout the wreath (every 20th wrap or whatever is needed).
The completed wrap!
Step 3: Cut your birds out using this template from Ashley at Cherished Bliss (just scroll down her post a bit and you'll find the birdie template). Make sure that you reverse the bird for the other side, so the correct side of the fabric shows.
Step 4: Attach the wing to the front portion of the bird. Didn't Tyler do a great job?! We don't have a sewing machine, so we did this by hand.
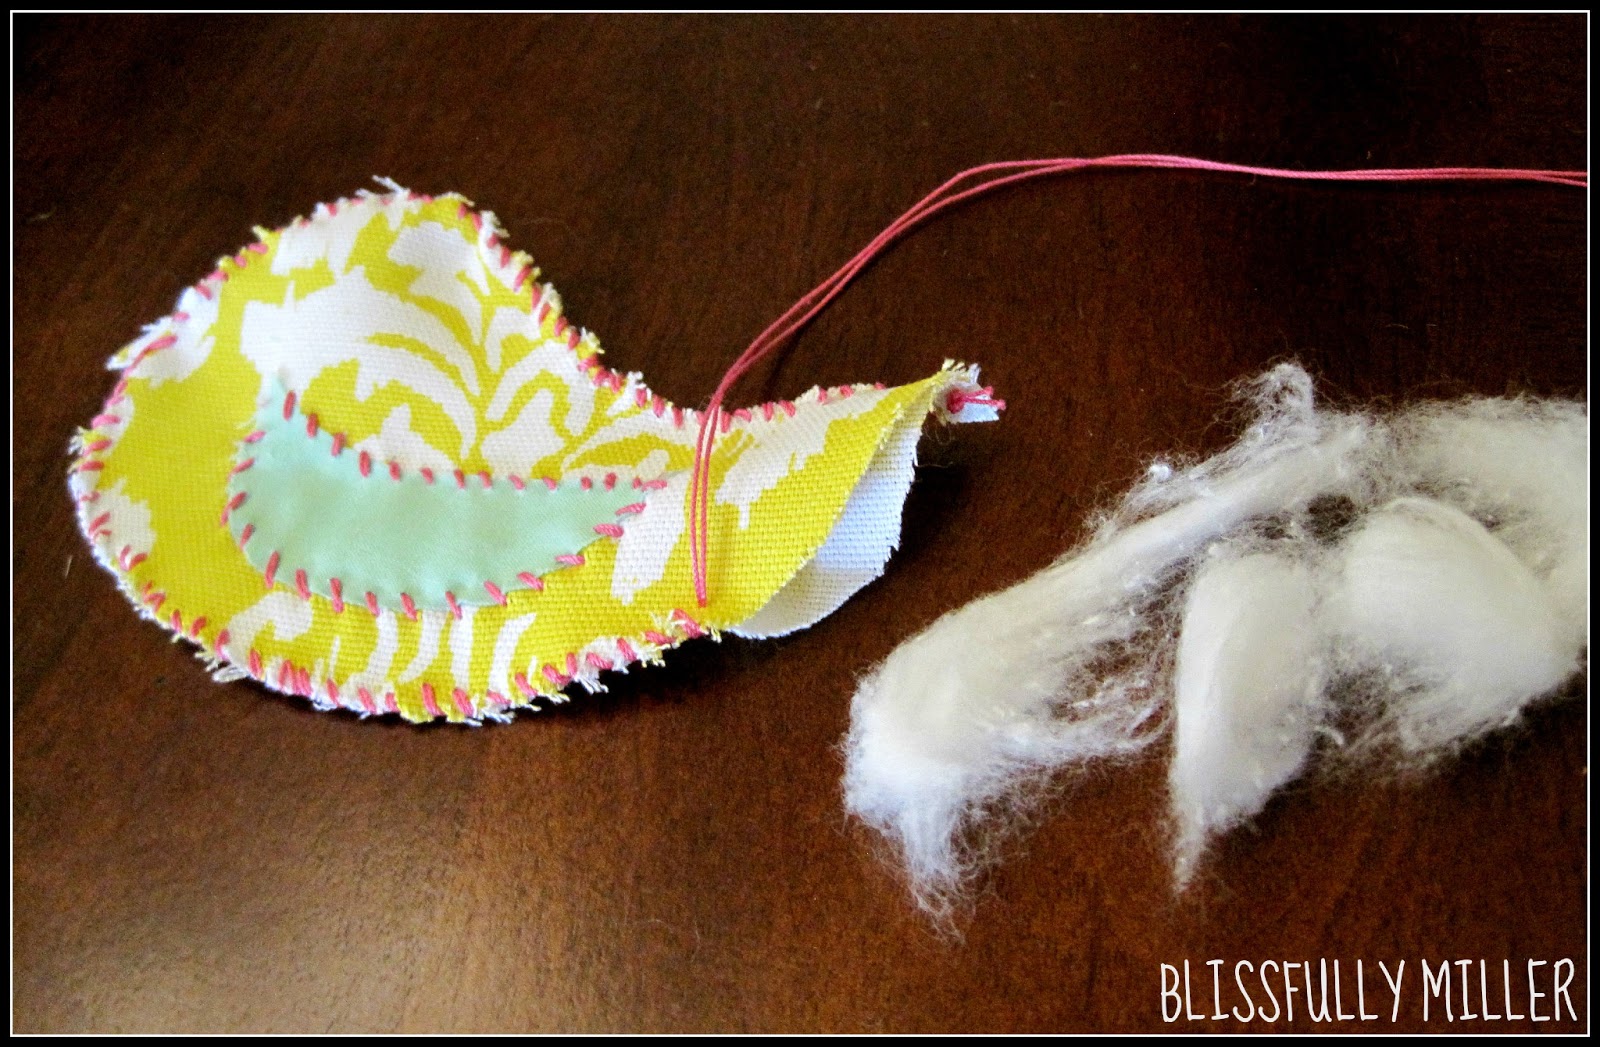
Step 5: Sew the two sides of the bird together, leaving a gap at the tail. Tear a cotton ball(s) and insert through the gap (We used a pencil). Once the bird is stuffed to your liking, finish sewing until complete.
Repeat steps 3-5 for the smaller birds.
Step 6: Trace flowers onto your fabric of choice. I Googled 'Flower Template', decided on a pattern, then traced it on a sheet of paper and cut it out for tracing to the fabric.
Step 7: Using straight pins (or thumb tacks), attach the birds and the flowers to the wreath.
Step 8: Using ribbon or colorful twine, hang the wreath and ENJOY!

Overall, I'm pretty happy with the end result! I would suggest not using the Natural Jute, if you've got a dark stained wooden door... you can tell with mine that there's not much color differentiation. I would also place the Styrofoam wreath on your door and walk out to the street (or across the street) to see if it will be "big" enough - this way you can exchange it if it doesn't work.. I didn't do this and the wreath looks teeny-tiny from the road.

Budget Breakdown:
Styrofoam Wreath: $2.99 (with Hobby Lobby Coupon)
Natural Jute: $3.99
Pattern Fabric 1: $4.99 (1/2 Yard)
Pattern Fabric 2: $4.99 (1/2 Yard)
Solid Fabric 1: $3.99 (1/2 Yard)
Solid Fabric 2: $3.99 (1/2 Yard)
Thread: $2.99
Glue Gun/Glue Sticks: Already Owned
TOTAL: $28.32

Saw it. Pinned it. Did it.
Linking up with Beautiful Mess and Keep Calm & Carry on.

Happy Thursday!

Photobucket

Thursday, March 21, 2013

DIY Tutu - Saw It, Pinned It, Did It!


 I am so excited to be joining Stephanie and Katie for their weekly Saw It, Pinned It, Did It link-up! Tyler and I, and a group of friends, are running in a 5k this weekend. The race is at night and the runners are encouraged to dress up, since there's a costume contest after! So naturally, the girls decided on wearing tutus! :) I pinned this tutu the other day as a how-to and here we are! My friend Kara made her tutu last weekend and it turned out so cute! Off I went to Hobby Lobby to pick up the materials, which included neon tulle and ribbon! Kara had leftover glow in the dark puff paint, so I borrowed that for mine.

Step 1: Get material from your local craft store (I went to Hobby Lobby).
Step 2: Wrap the roll of tulle around cardboard, or other object. Make sure it's the size you want it, based on how short/long you want the tutu. I had this for another project I'm working on.. I just put the top end at my waist to see where the bottom hit on my leg, and it worked perfect.
Step 3: Remove from cardboard, or other object, and cut the top in half. If you're using more than one color, repeat steps 2 and 3 until all are cut.
This is what the end result looks like, after cutting the tulle.
Step 4: Cut your ribbon for around your waist. I was making 2 tutus, so I cut this entire roll in half, which worked/measured perfectly.
Step 5: Fold each tulle piece in half
Step 6: Place halved tulle piece under the ribbon, like above.
Step 7: Loop the bottom portion through the top 'hole' portion and pull down, like above. Think under-over and pull.
Step 8: Once pulled tightly, make sure there aren't any gaps between each piece of tulle. I used 4 pieces per color, you can add more or less - depending on how much of one color you want shown.
Progress!!
Step 9 {Optional}: I added neon ribbon randomly on the tutu, which is secured the same way the tulle is (steps 5-7). I also added the glow in the dark puff paint, so we will glow for our night run!
Voila! Finished product, which I'm beyond thrilled about! Love it and I can't wait to rock a tutu on Saturday night!

 Now, for the budget breakdown!
Pink and Blue Tulle - $4.99 each
Yellow and Purple Tulle - $3.99 each
Neon Yellow Ribbon (for waist) - $3.99
Pink and Yellow Ribbon - $1.99 each
Puff Paint - Borrowed
Tutu Total: $28.15

Not too shabby, considering the cheapest on on Etsy was $30, which didn't include tax or shipping. I had just missed the sale on tulle (it was half price last weekend), so this project could be much more cost effective! This would be a perfect project if you have a little girl or if you have a race that are "dressing up" for! The options are endless!

This was such a fun project to work on with Kara! Be sure to keep an eye out next week.. I'm sure there will be lots of pictures from our 5k! :) Oh, and if you're running in the Firefly Run, you know what we're wearing - so look for us!


Saw it. Pinned it. Did it.
Linking up with Beautiful Mess and Keep Calm & Carry on.

Happy Thursday!

Photobucket

Tuesday, February 5, 2013

Bathroom Facelift!

 
I seriously have a hate-hate relationship with the boring 'Builder's Beige'! Our guest bathroom was all sorts of beige, in all the wrong ways... I mean how depressing can a bathroom be?! A few weekends ago, Tyler and I tackled this baby - ceilings and all! We didn't want a single trace of the boring beige that consumed our guest bathroom. It's ah-mazing the difference a little paint makes!!

Ceiling Paint Color: Cream in my Coffee


We are ecstatic with the results of our bathroom facelift! But, this room's not finished yet...
To-Do's:
- Paint
- New light fixture
- Hang floating shelves
- Frame out the mirror
- Paint the cabinets
- Update vanity hardware
- Change out all fixtures to oil rubbed bronze
- New shower curtain (that's ceiling height)
- Purchase new linens
- Update decorations
- Install granite counter top 


What rooms have you been updating? Have any plans to give your bathroom a makeover? 
Have a great Tuesday!
 
Photobucket